Monday 31 January 2011

Level Building


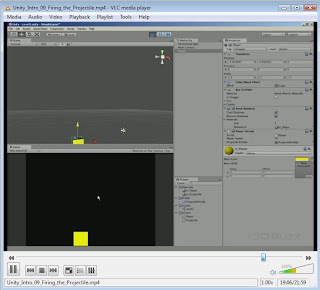
My next task was to greybox some levels which can serve as a placeholder for while my game is in development. To do this I created my level and exported it as an FBX file using Maya. Then, I simply put this file into my Unity project folders.

However, exporting them as a singular files was a bad idea, as it messed up the box colliders in the level, which means that my character would simply just fall through the level.
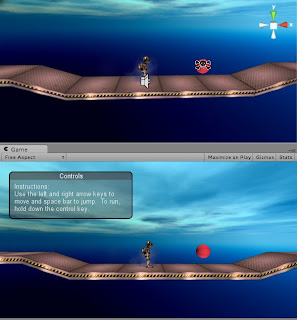
Therefore, I went back into Maya and exported the level piece-by-piece. This solved my problem and my character sat on the platforms. I then found another problem with my platforms:


The collider I was using only formed a box around the object, so when my character walked over the platform, it did not fall into the small pit as I intended. This was fixed by deleting the “box collider” and replacing it with a “Mesh Collider.”

Friday 28 January 2011

Time Management


After my tutorial, it became apparent that I need to carefully schedule how I spend my time. Although I made a work timetable as part of my learning agreement, I want to make a new one, which is a little more specific now I know what is required for my game.

Here is a list of things I need to do by 23rd May 2011: (so far)

-Rig protagonist
-Texture protagonist
-Animate protagonist (Walking, Running, Idle, throwing, dying, jumping, falling, landing etc)
-Prototype level (with Javascript)
-Model enemies
-Rig enemies
-Texture enemies
-Animate enemies
-Program enemies
-Model extra assets
-Texture extra assets
-Model environment
-Texture environment
-Program Projectiles
-Put assets into game
-Lighting
-Effects
-Sound/Music
-Play testing stage
-Develop, improve and polish game

To manage these tasks, I was advised to make and use a “Gantt” chart. They can be saved as images, PDFs or as a html file.


My schedule starts from today and ends on the hand-in date: 23/05/2011. I feel very confident that I can complete my game in this timeframe. I given myself the most time to do animating, as it is an area I may struggle with.

My next task is to greybox my level, ready for prototyping.

Unity Progress So Far…


Immediately after my first hand-in, I knew it would be important to come to grips with Unity as early as possible. Therefore, I went back to the 2D gameplay tutorial that I started in BA7, and began to work on it further.

This tutorial gives you a work file and a pdf document. Last term, even though I followed the pdf closely, I still found myself with errors, such as the character respawning when he jumps. After researching, it was extremely simple to fix and I even got my character to respawn after falling down a hole. I then made a few platforms to jump to, and adjusted the camera.

Here are the things I learned from the Tutorial:

Learned how to restrict movement to a 2D plane;

Built level with tileable platforms;

Set level boundaries;

Been introduced to Gizmos;

Explored the fundamentals of setting up a Character;

Explored the complexities of setting the camera;

Seen how to make a strict orthographic camera view;

Learned how to place and make Rigidbodies;

Used waypoint system to create moving platforms;


Also in the tutorial, I learned about “Skyboxes.” A skybox is a special kind of background which makes the level environment look bigger. The skybox’s image is made by cube mapping, which involves putting six different textures on cube faces.


Next, I wanted to let the camera follow the character more smoothly and closely. This is done with scripting.

Although I am quite new to scripting, the example workfile has notes in the script, saying what each piece of script does. This was greatly helpful, as it let me understand how every bit of script affected the game. Here is a part of the script for the camera.


Next, I wanted to add more mechanics into my game.

I firstly wanted to add enemies to the game which move around and destroy the player on contact. Since this mechanic was not on the 2D gameplay tutorial, I had to look up how to do this myself using scripting. The 2D gameplay tutorial only used Javascript, yet the coding I used for the enemy was in C#. I changed the enemy’s code from C# to Javascript using the script reference on the Unity Website. This was a very helpful resource, as it showed script examples in different languages. I used a simple sphere to represent my enemy. Fortunately, the mechanic worked.


I then tried to use some video tutorials to make my character use projectiles. The tutorial I looked at taught me how to make a kind of top down space shooter game. However, although some aspects of the projectile worked, it was generally very broken. Therefore, I will have to figure out how to do it on my own using scripting in Javascript.


Monday 24 January 2011

Modelling Warm-Up: Projectiles


Here is an example of the projectiles my character will use to defeat her enemies (Cakes, donuts, macarons). They are very simple, as they will only be small on the game screen.