Wednesday 24 August 2011

Fiammetta - by Sophia George

This blog documents the process of my final degree work at NUCA – a simple platform game called Fiammetta. Here you will find work ranging from research, early concepts and sketches to my finished prototype game.
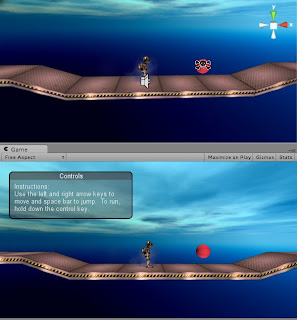
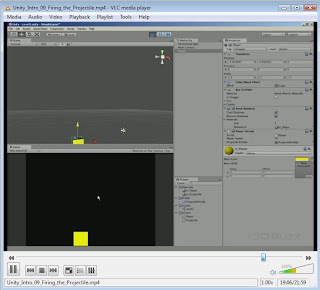
This project helped me to further my skills in 3D, animation and design, as well as serve an introduction to using a game engine. Fiammetta was created in Unity3d and only offers simple mechanics like running and jumping.
Although the game is simple, learning to make it helped me prep my own 3D work for a game engine and making it work using javascript.

For more of my work and writing, please visit SophiaGeorge.com

Sunday 15 May 2011

Screenshots


Here are a few screenshots of my game in the Unity engine. In these images, you can see the various assets I modelled and textured.

Character Animations

Here are my character animations that will go into my Showreel. These animations were split up and put into Unity, although I had a lot of trouble making them work, so Leigh helped me with the coding.

Sunday 27 March 2011

Progress

This week I had a meeting with my course leader to discuss my progress. I explained the progress of my level prototype, my new website and the documents I am making for the hand in. These include a document detailing my Unity research, my aesthetic development and my 3D progression. My teacher recommended I include documents about extra research, such as sound, music, after effects, etc, as well as a document on my Dare to be Digital project.

Due to the workload of the Dare to be Digital project (Due in for April 3rd) I feel that my studio practise has become slightly disorganised. Therefore, I edited my Schedule to include more realistic goals:


Sunday 6 March 2011

Texturing & head handle


This is the final texture for my protagonist. I also added a NURBS circle which can control the head.


Wednesday 2 March 2011

Enemy Characters


Here are my enemy characters, modelled, rigged and textured.

Monday 21 February 2011

Painting Weights

Next, after adding ribs to the model to make sure it deforms properly, I tested the rig by posing my model using the handles I created. However, the automatically assigned influences of the joints have not worked properly: when the arm moves, so does the face, when the right foot moves, parts of the left foot move too.


To stop this from happening, I had to use to paint weights tool to correct the influences. This was a very tedious task and took a few hours to complete.


Once I finished painting weights, I could pose the character without any strange deformations. Now the model is ready for animation, although my final texture is still not ready.


Sunday 20 February 2011

Custom Shader


For my 3D model, I wanted to use a custom shader to create a more stylised look. I will have to do more research into custom shaders, so I can get them to work in Unity.

I found an interesting shader in a tutorial from http://ant-online.co.uk/ and applied it to my model, along with a few changed and a basic texture that I quickly made. This will not be my final texture

Monday 14 February 2011

Rigging


Rigging characters has always been an area that I struggle with, maybe due to lack of practise. Therefore, since it is vital that my character has a good rig, I bought a book on animating in Maya for help.

From reading this book and working on my character, I feel that I understand rigging, as well as Maya in general a lot more than before. Although I rigged a few models in my first and second years, I now have a much deeper understanding of the tools.


For example, while I was working on my character’s foot, I learned to make custom attributes, using the connection editor. When rigging the arms, I learned about pole vectors and creating more advanced controllers than what I had made in the past.


Also, I rigged by characters spine differently than I had done in the past. I used the IK Spline tool, which is used to control a chain of joints. I also learned to use clusters and created various handles to move my character easily.


My Character in Unity


I added my finished 3D model to the unity engine by exporting it as an fbx file from Maya, and then adding it to the Unity files. I looked at the properties of the placeholder cube, and changed its mesh properties to match my 3D model. The model kept the same texture as the cube before it.


My next task is to rig my model and texture it.

Monday 7 February 2011

Improved Model


Recently, I improved my 3D model by editing the elbows, knees and waist. This was to allow for better animation. The UV maps are also done for this model.

Wednesday 2 February 2011

Prototype Level


I have now built my prototype level in Unity, along with a place holder character that can walk and jump and also a moving platform. I have not included more advanced mechanics yet, such as enemies and shooting, as that is scheduled at a later stage. I have tested the level with the character and it can easily reach all of the platforms.

Monday 31 January 2011

Level Building


My next task was to greybox some levels which can serve as a placeholder for while my game is in development. To do this I created my level and exported it as an FBX file using Maya. Then, I simply put this file into my Unity project folders.

However, exporting them as a singular files was a bad idea, as it messed up the box colliders in the level, which means that my character would simply just fall through the level.
Therefore, I went back into Maya and exported the level piece-by-piece. This solved my problem and my character sat on the platforms. I then found another problem with my platforms:


The collider I was using only formed a box around the object, so when my character walked over the platform, it did not fall into the small pit as I intended. This was fixed by deleting the “box collider” and replacing it with a “Mesh Collider.”

Friday 28 January 2011

Time Management


After my tutorial, it became apparent that I need to carefully schedule how I spend my time. Although I made a work timetable as part of my learning agreement, I want to make a new one, which is a little more specific now I know what is required for my game.

Here is a list of things I need to do by 23rd May 2011: (so far)

-Rig protagonist
-Texture protagonist
-Animate protagonist (Walking, Running, Idle, throwing, dying, jumping, falling, landing etc)
-Prototype level (with Javascript)
-Model enemies
-Rig enemies
-Texture enemies
-Animate enemies
-Program enemies
-Model extra assets
-Texture extra assets
-Model environment
-Texture environment
-Program Projectiles
-Put assets into game
-Lighting
-Effects
-Sound/Music
-Play testing stage
-Develop, improve and polish game

To manage these tasks, I was advised to make and use a “Gantt” chart. They can be saved as images, PDFs or as a html file.


My schedule starts from today and ends on the hand-in date: 23/05/2011. I feel very confident that I can complete my game in this timeframe. I given myself the most time to do animating, as it is an area I may struggle with.

My next task is to greybox my level, ready for prototyping.

Unity Progress So Far…


Immediately after my first hand-in, I knew it would be important to come to grips with Unity as early as possible. Therefore, I went back to the 2D gameplay tutorial that I started in BA7, and began to work on it further.

This tutorial gives you a work file and a pdf document. Last term, even though I followed the pdf closely, I still found myself with errors, such as the character respawning when he jumps. After researching, it was extremely simple to fix and I even got my character to respawn after falling down a hole. I then made a few platforms to jump to, and adjusted the camera.

Here are the things I learned from the Tutorial:

Learned how to restrict movement to a 2D plane;

Built level with tileable platforms;

Set level boundaries;

Been introduced to Gizmos;

Explored the fundamentals of setting up a Character;

Explored the complexities of setting the camera;

Seen how to make a strict orthographic camera view;

Learned how to place and make Rigidbodies;

Used waypoint system to create moving platforms;


Also in the tutorial, I learned about “Skyboxes.” A skybox is a special kind of background which makes the level environment look bigger. The skybox’s image is made by cube mapping, which involves putting six different textures on cube faces.


Next, I wanted to let the camera follow the character more smoothly and closely. This is done with scripting.

Although I am quite new to scripting, the example workfile has notes in the script, saying what each piece of script does. This was greatly helpful, as it let me understand how every bit of script affected the game. Here is a part of the script for the camera.


Next, I wanted to add more mechanics into my game.

I firstly wanted to add enemies to the game which move around and destroy the player on contact. Since this mechanic was not on the 2D gameplay tutorial, I had to look up how to do this myself using scripting. The 2D gameplay tutorial only used Javascript, yet the coding I used for the enemy was in C#. I changed the enemy’s code from C# to Javascript using the script reference on the Unity Website. This was a very helpful resource, as it showed script examples in different languages. I used a simple sphere to represent my enemy. Fortunately, the mechanic worked.


I then tried to use some video tutorials to make my character use projectiles. The tutorial I looked at taught me how to make a kind of top down space shooter game. However, although some aspects of the projectile worked, it was generally very broken. Therefore, I will have to figure out how to do it on my own using scripting in Javascript.


Monday 24 January 2011

Modelling Warm-Up: Projectiles


Here is an example of the projectiles my character will use to defeat her enemies (Cakes, donuts, macarons). They are very simple, as they will only be small on the game screen.